Control Point Management
Adding a Control Point
Deleting a Control Point
Tap the control point counter
 in the status panel to open a list of the control points in the current dataset
 Tap the control point you wish to delete
Tap the
 delete icon
 To undo the deletion, tap UNDO within eight seconds
Editing a Control Point ID
- Tap the control point counterin the status panel to open a list of the control points in the current dataset.
- Tap the control point you wish to edit.
- Tap the Edit
 icon.
icon. - Edit the ID
- To save and close the keyboard, tap outside the ID field.
Panning, Rotating, Centering, and Zooming the Map
On the NavVis VLX user interface, users can pan, rotate, zoom, and center the map during the scan to confirm what has already been scanned.
After the NavVis VLX initializes, the default mode shows the pan button at the top left of the interface.
To pan, rotate, recenter, and zoom the map:
- After the VLX initializes, while scanning, touch the interface and use your finger to pan the map in any direction to see what has already been scanned.
- To rotate the map view, tap the pan button
 at the top left to switch to rotation mode. The rotate button
 appears at the top left to indicate the screen is in rotation mode.
 - With your finger(s), rotate the map left or right.
- The recenter button
 at the bottom left of the screen recenters the map.
 - To zoom in or out of the map view, pinch the interface to zoom out, and move two fingers away from each other to zoom in.
Changing the Vertical View of the Dataset
From the NavVis VLX user interface, you can change the vertical view of your dataset.
Follow these steps to change the vertical view of your dataset:
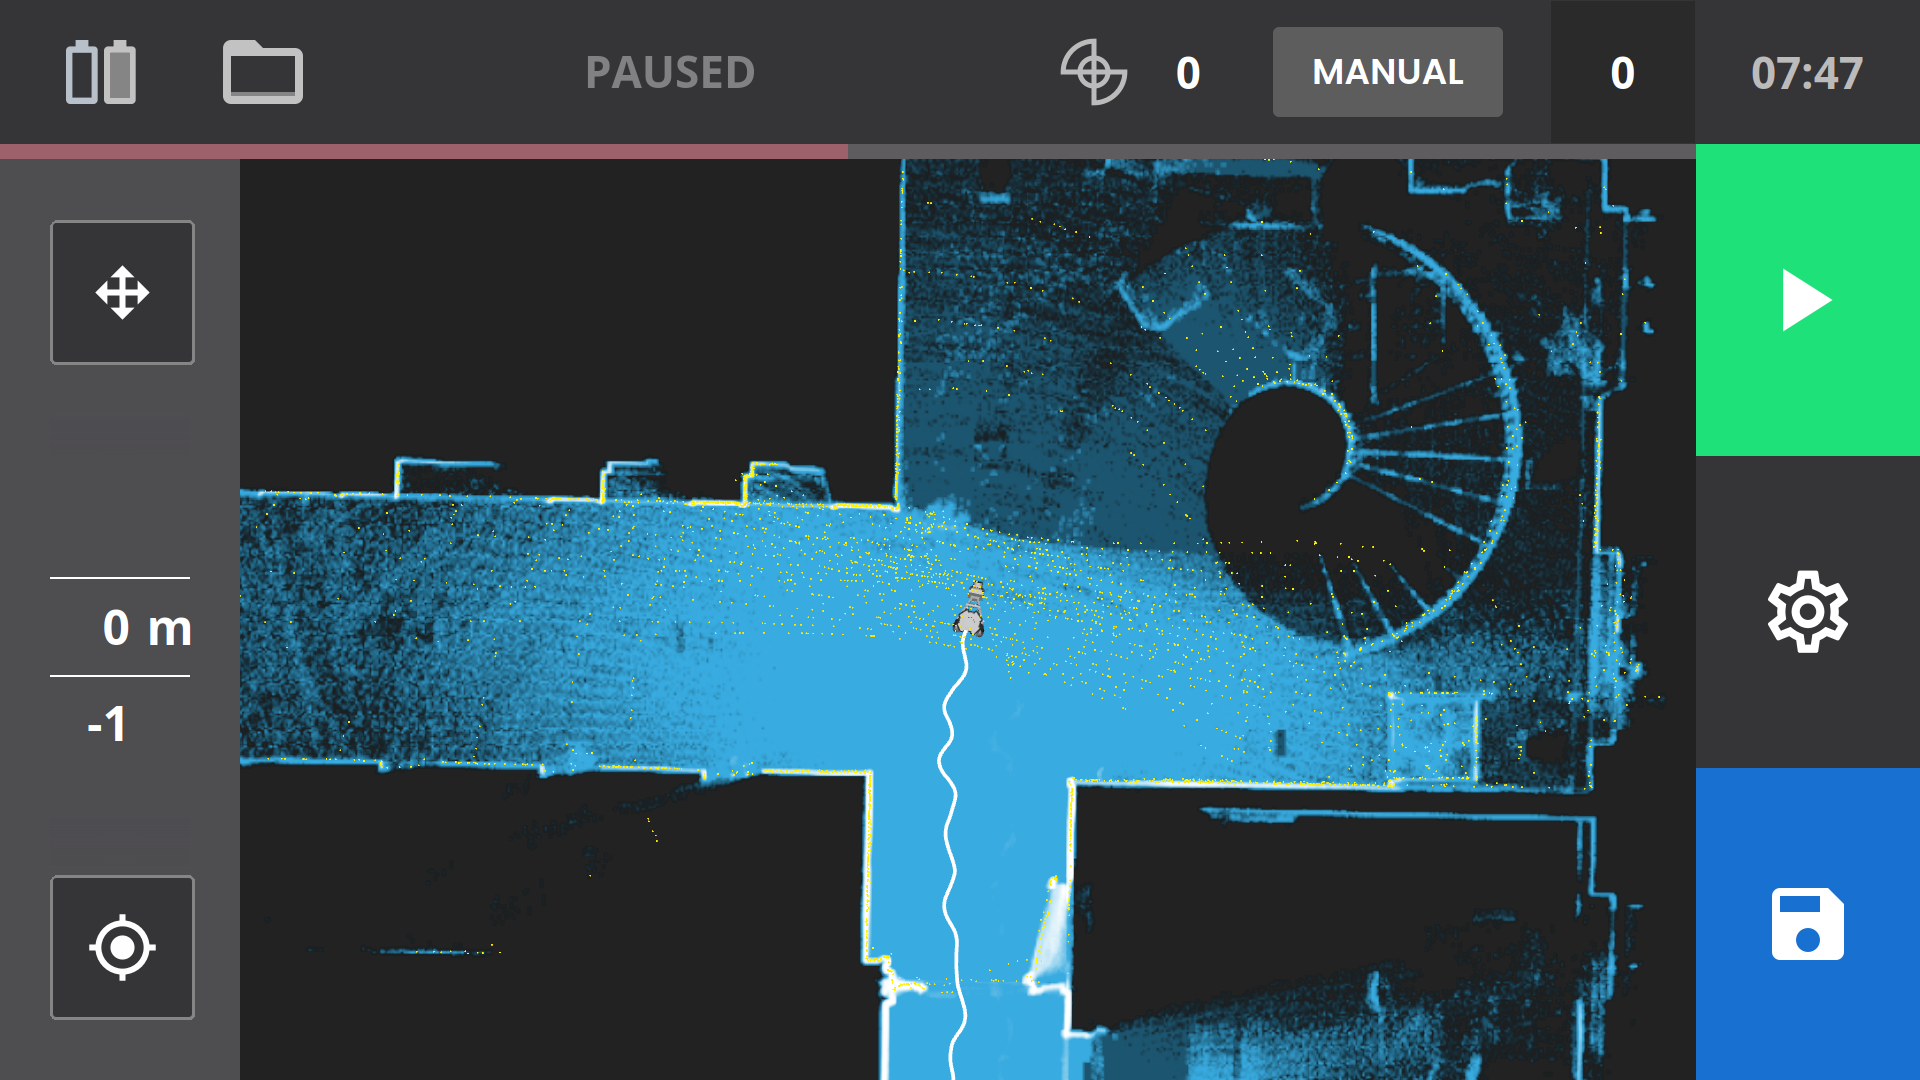
- During the scan, pause the scanning by tapping the Pause icon.

On the left of the user interface, the vertical view slider is displayed. Each number on the slider represents one meter (m) above (positive) or below (negative) the device's current location (0 m). Slide the vertical view slider up or down to move above or below the current view. As the slider moves, the selected meter number appears between the lines, and the scanned dataset at that meter level appears on the user interface.
Tap the start icon to resume scanning. The vertical view on the slider goes back to the current view (0 meters) and is hidden.
Previewing recorded images
To preview recorded images during a scan with the NavVis VLX, follow these steps:
- From the top right of the user interface, tap the image thumbnail. The scanning pauses and the captured images are displayed.
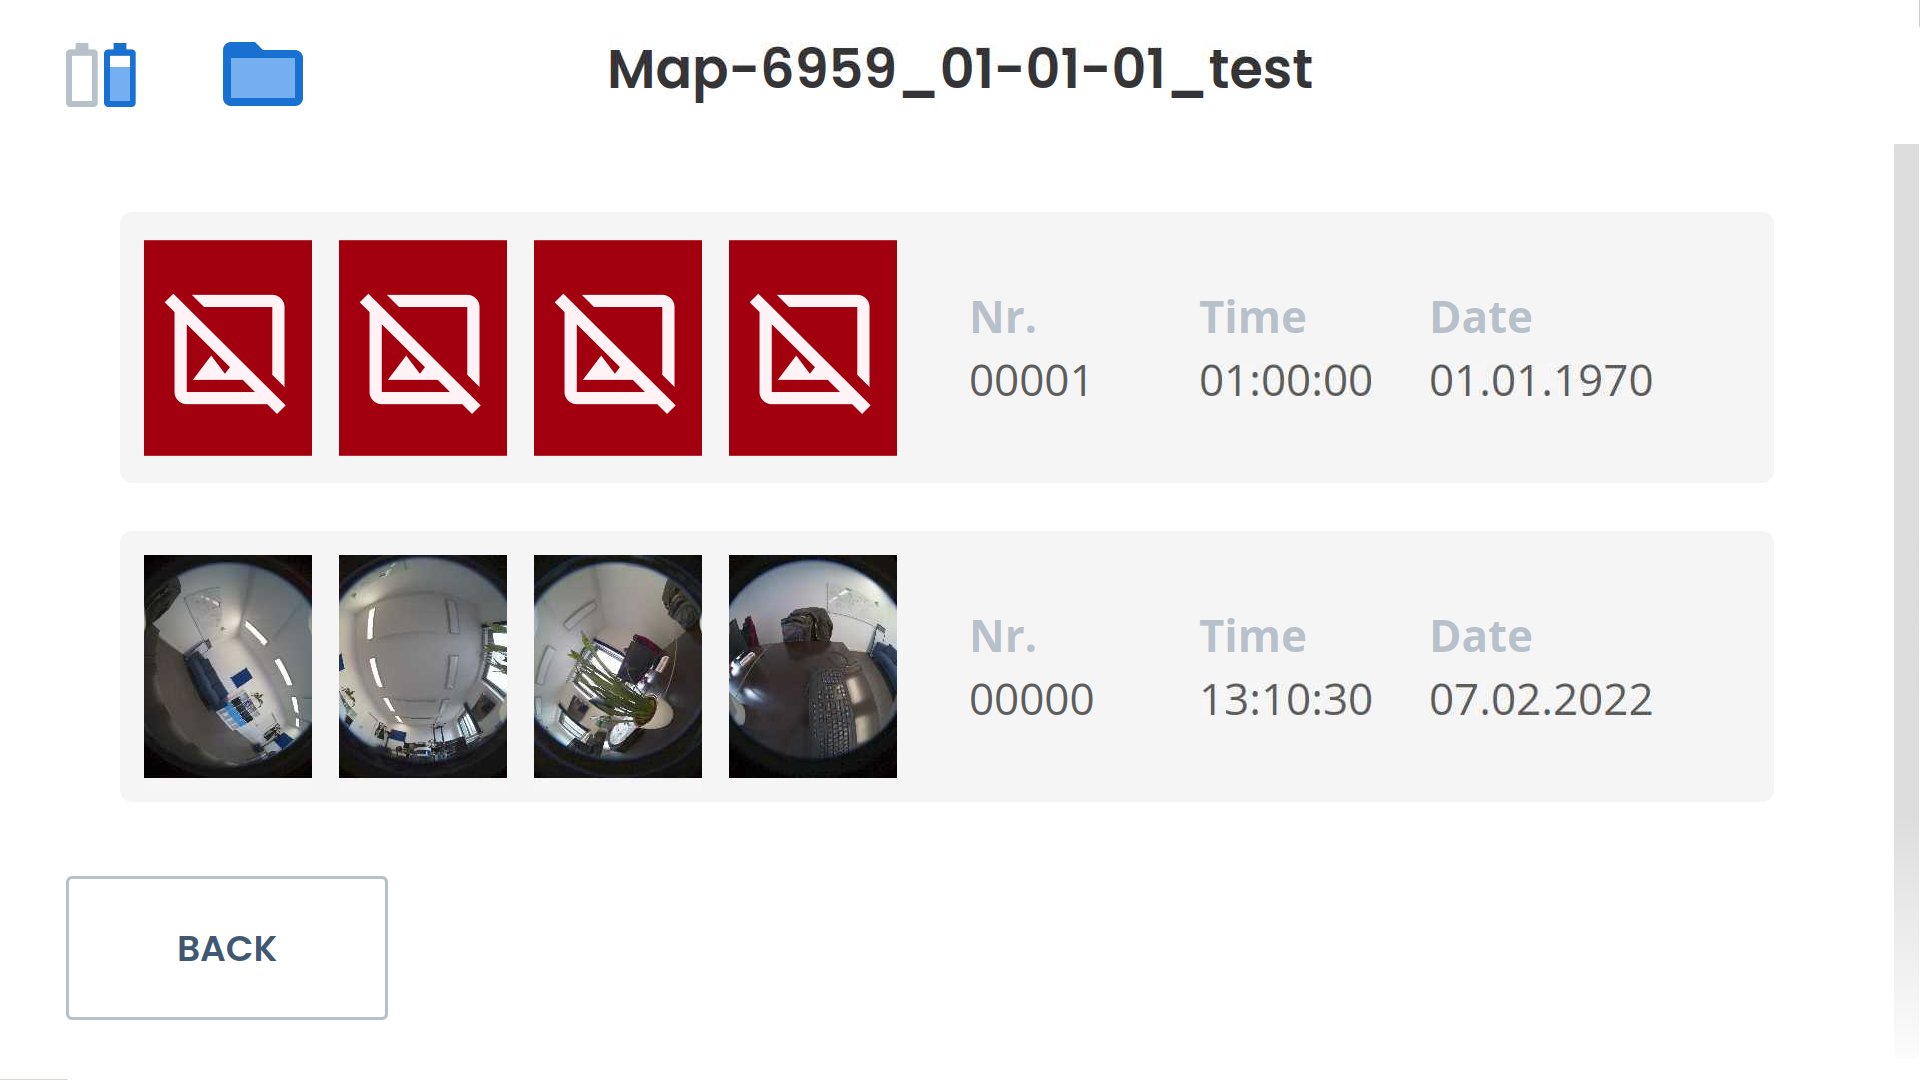
 Note: The thumbnail image shows the number of recorded images in the dataset.The following information is displayed for each set of captured panoramas: Image number, Time the image was recorded, Date the image was recorded.
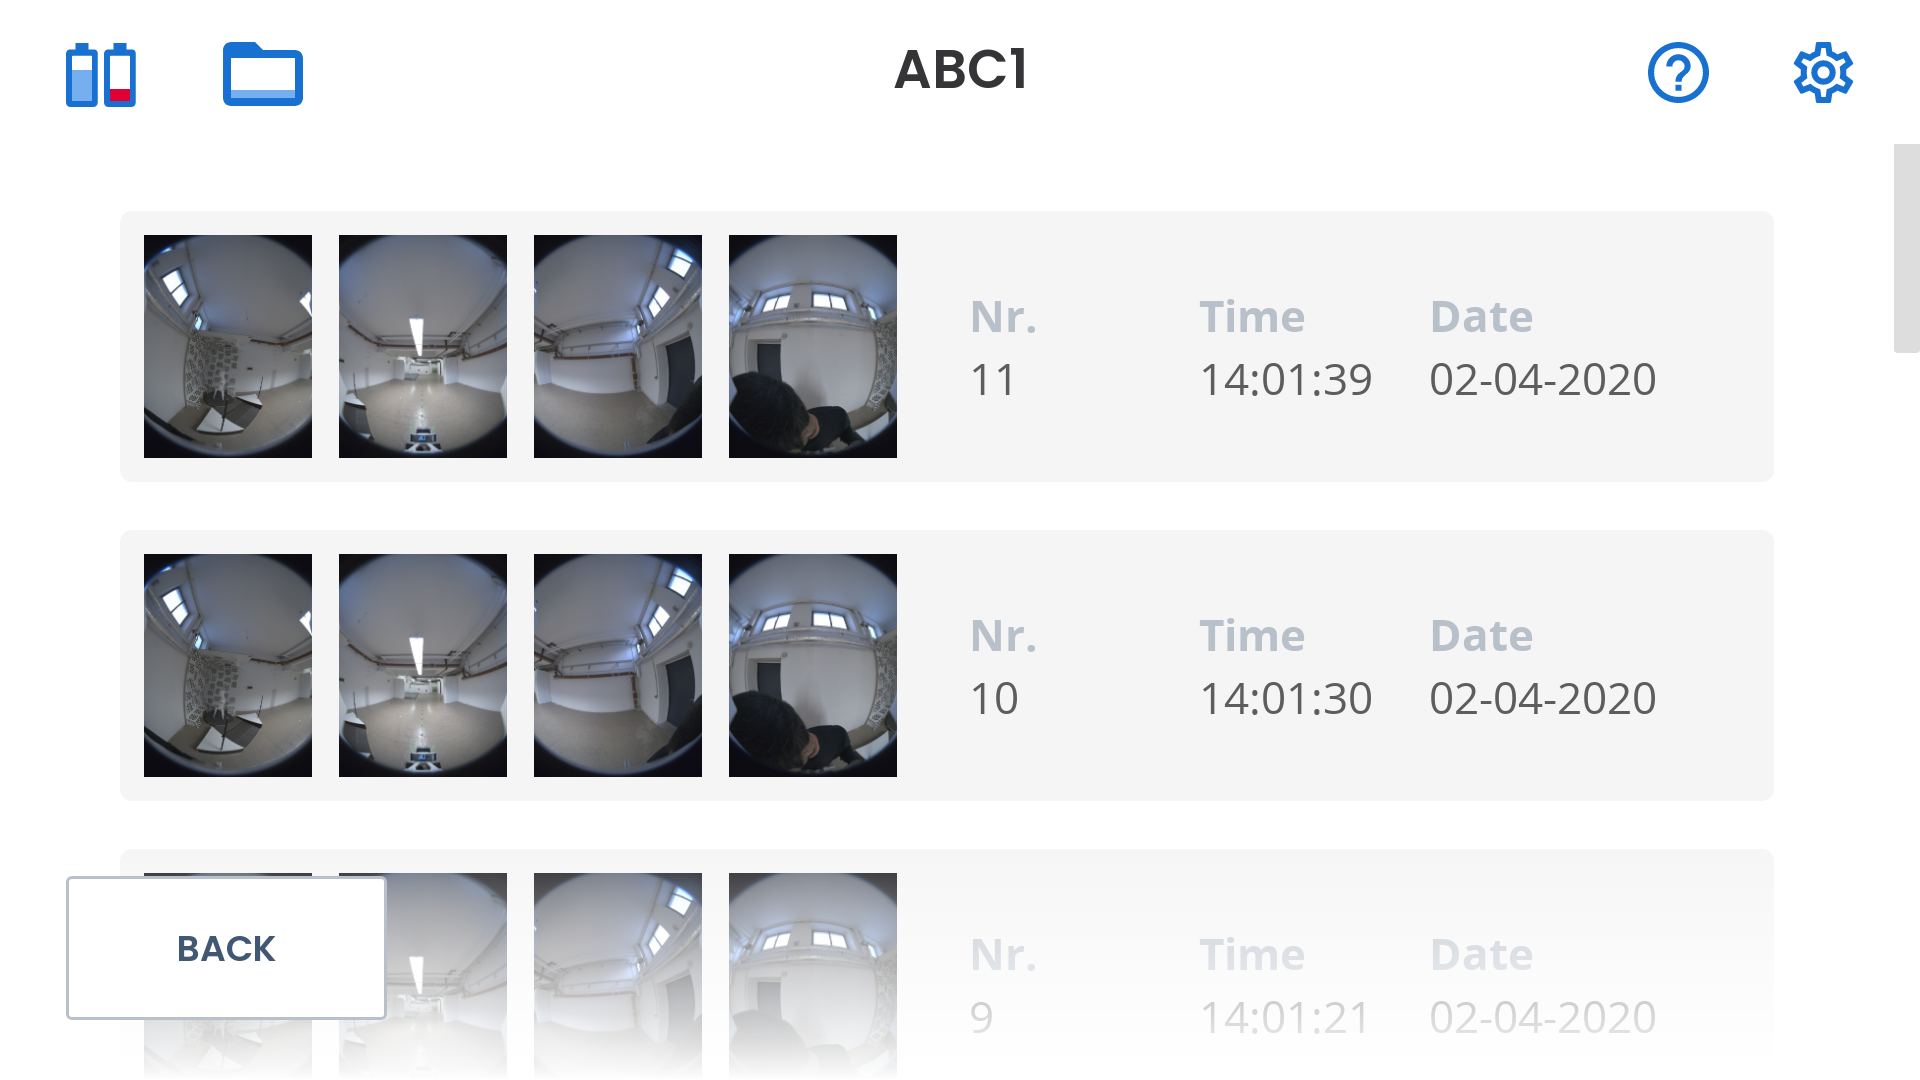
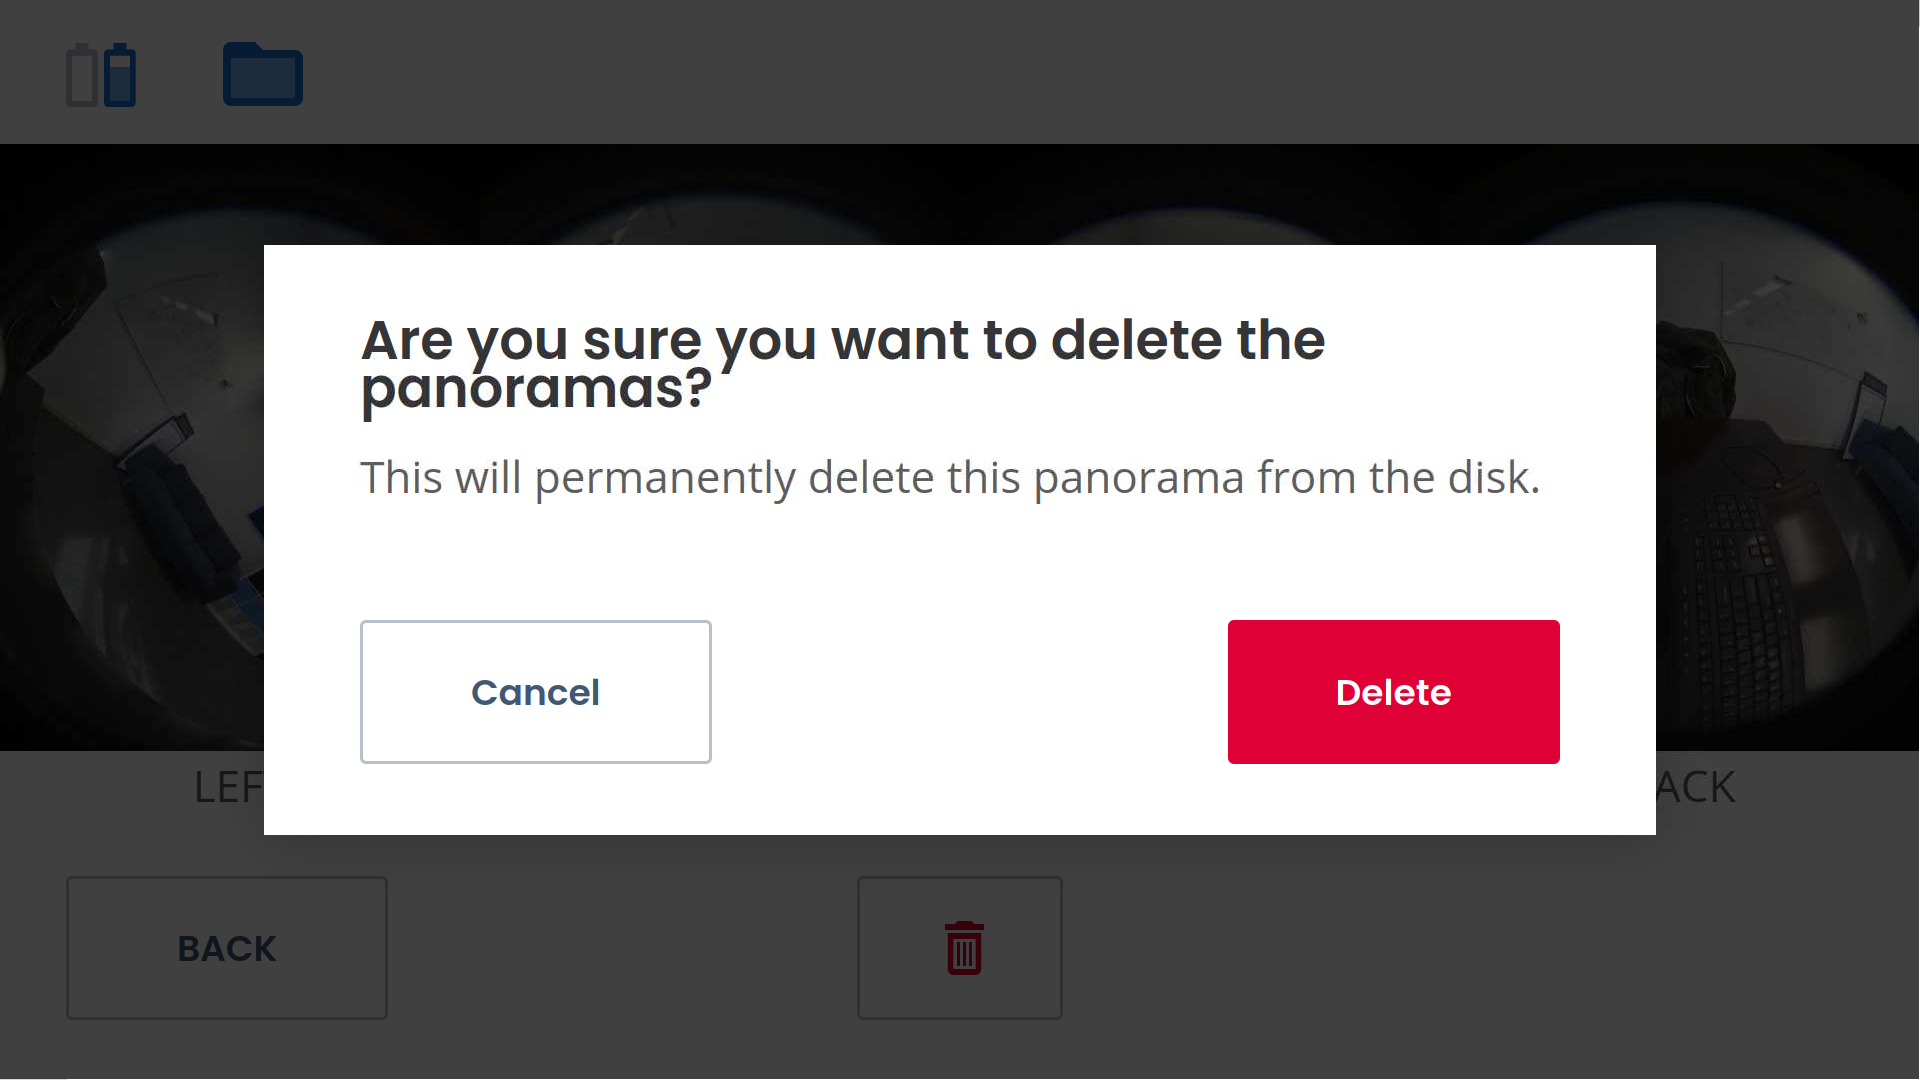
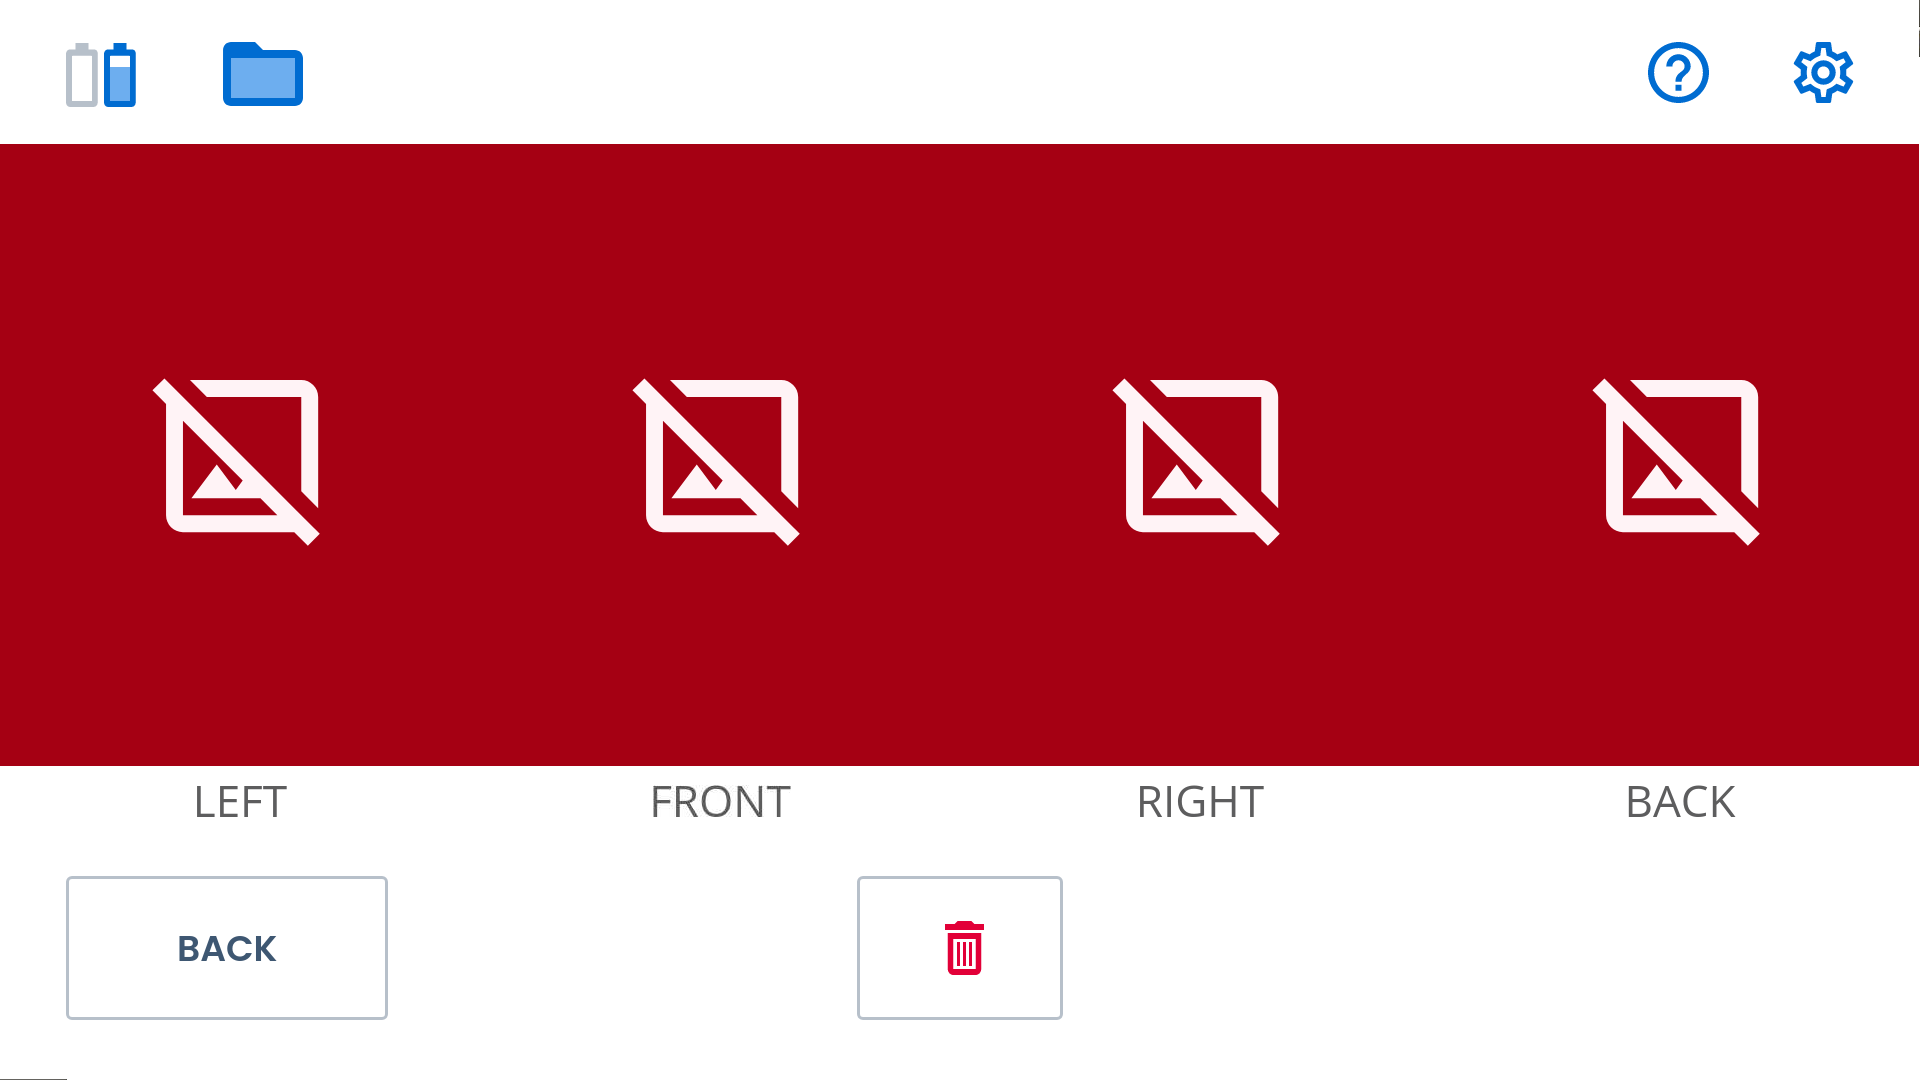
- From the panorama screen, tap a panorama to see a larger view of the panorama and the direction in which each image was captured (left, front, right back).
- If you want to delete the selected panorama, tap the delete icon.
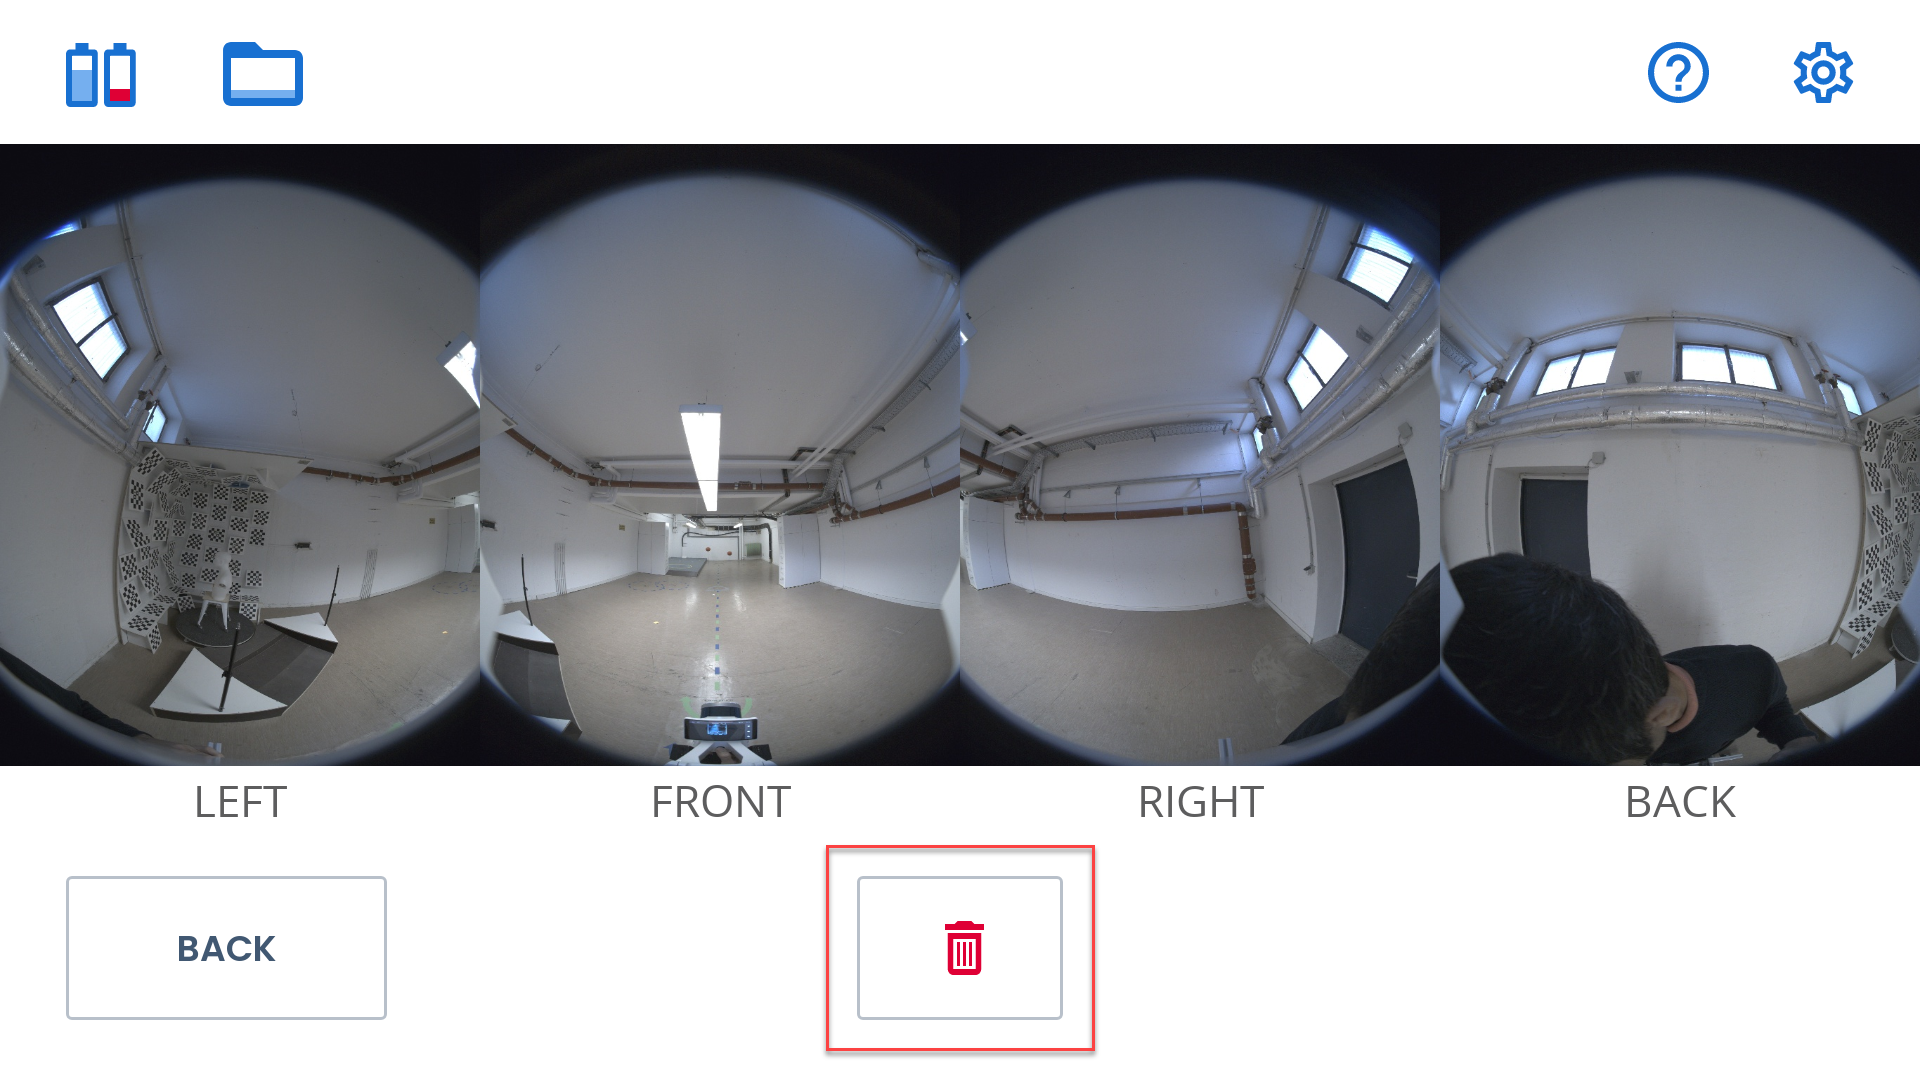
A confirmation message is displayed. Tap Delete. A delete symbol for each image in the panorama is displayed in the panorama small image and large image screen.